Scott Gallant and Laura Killingbeck
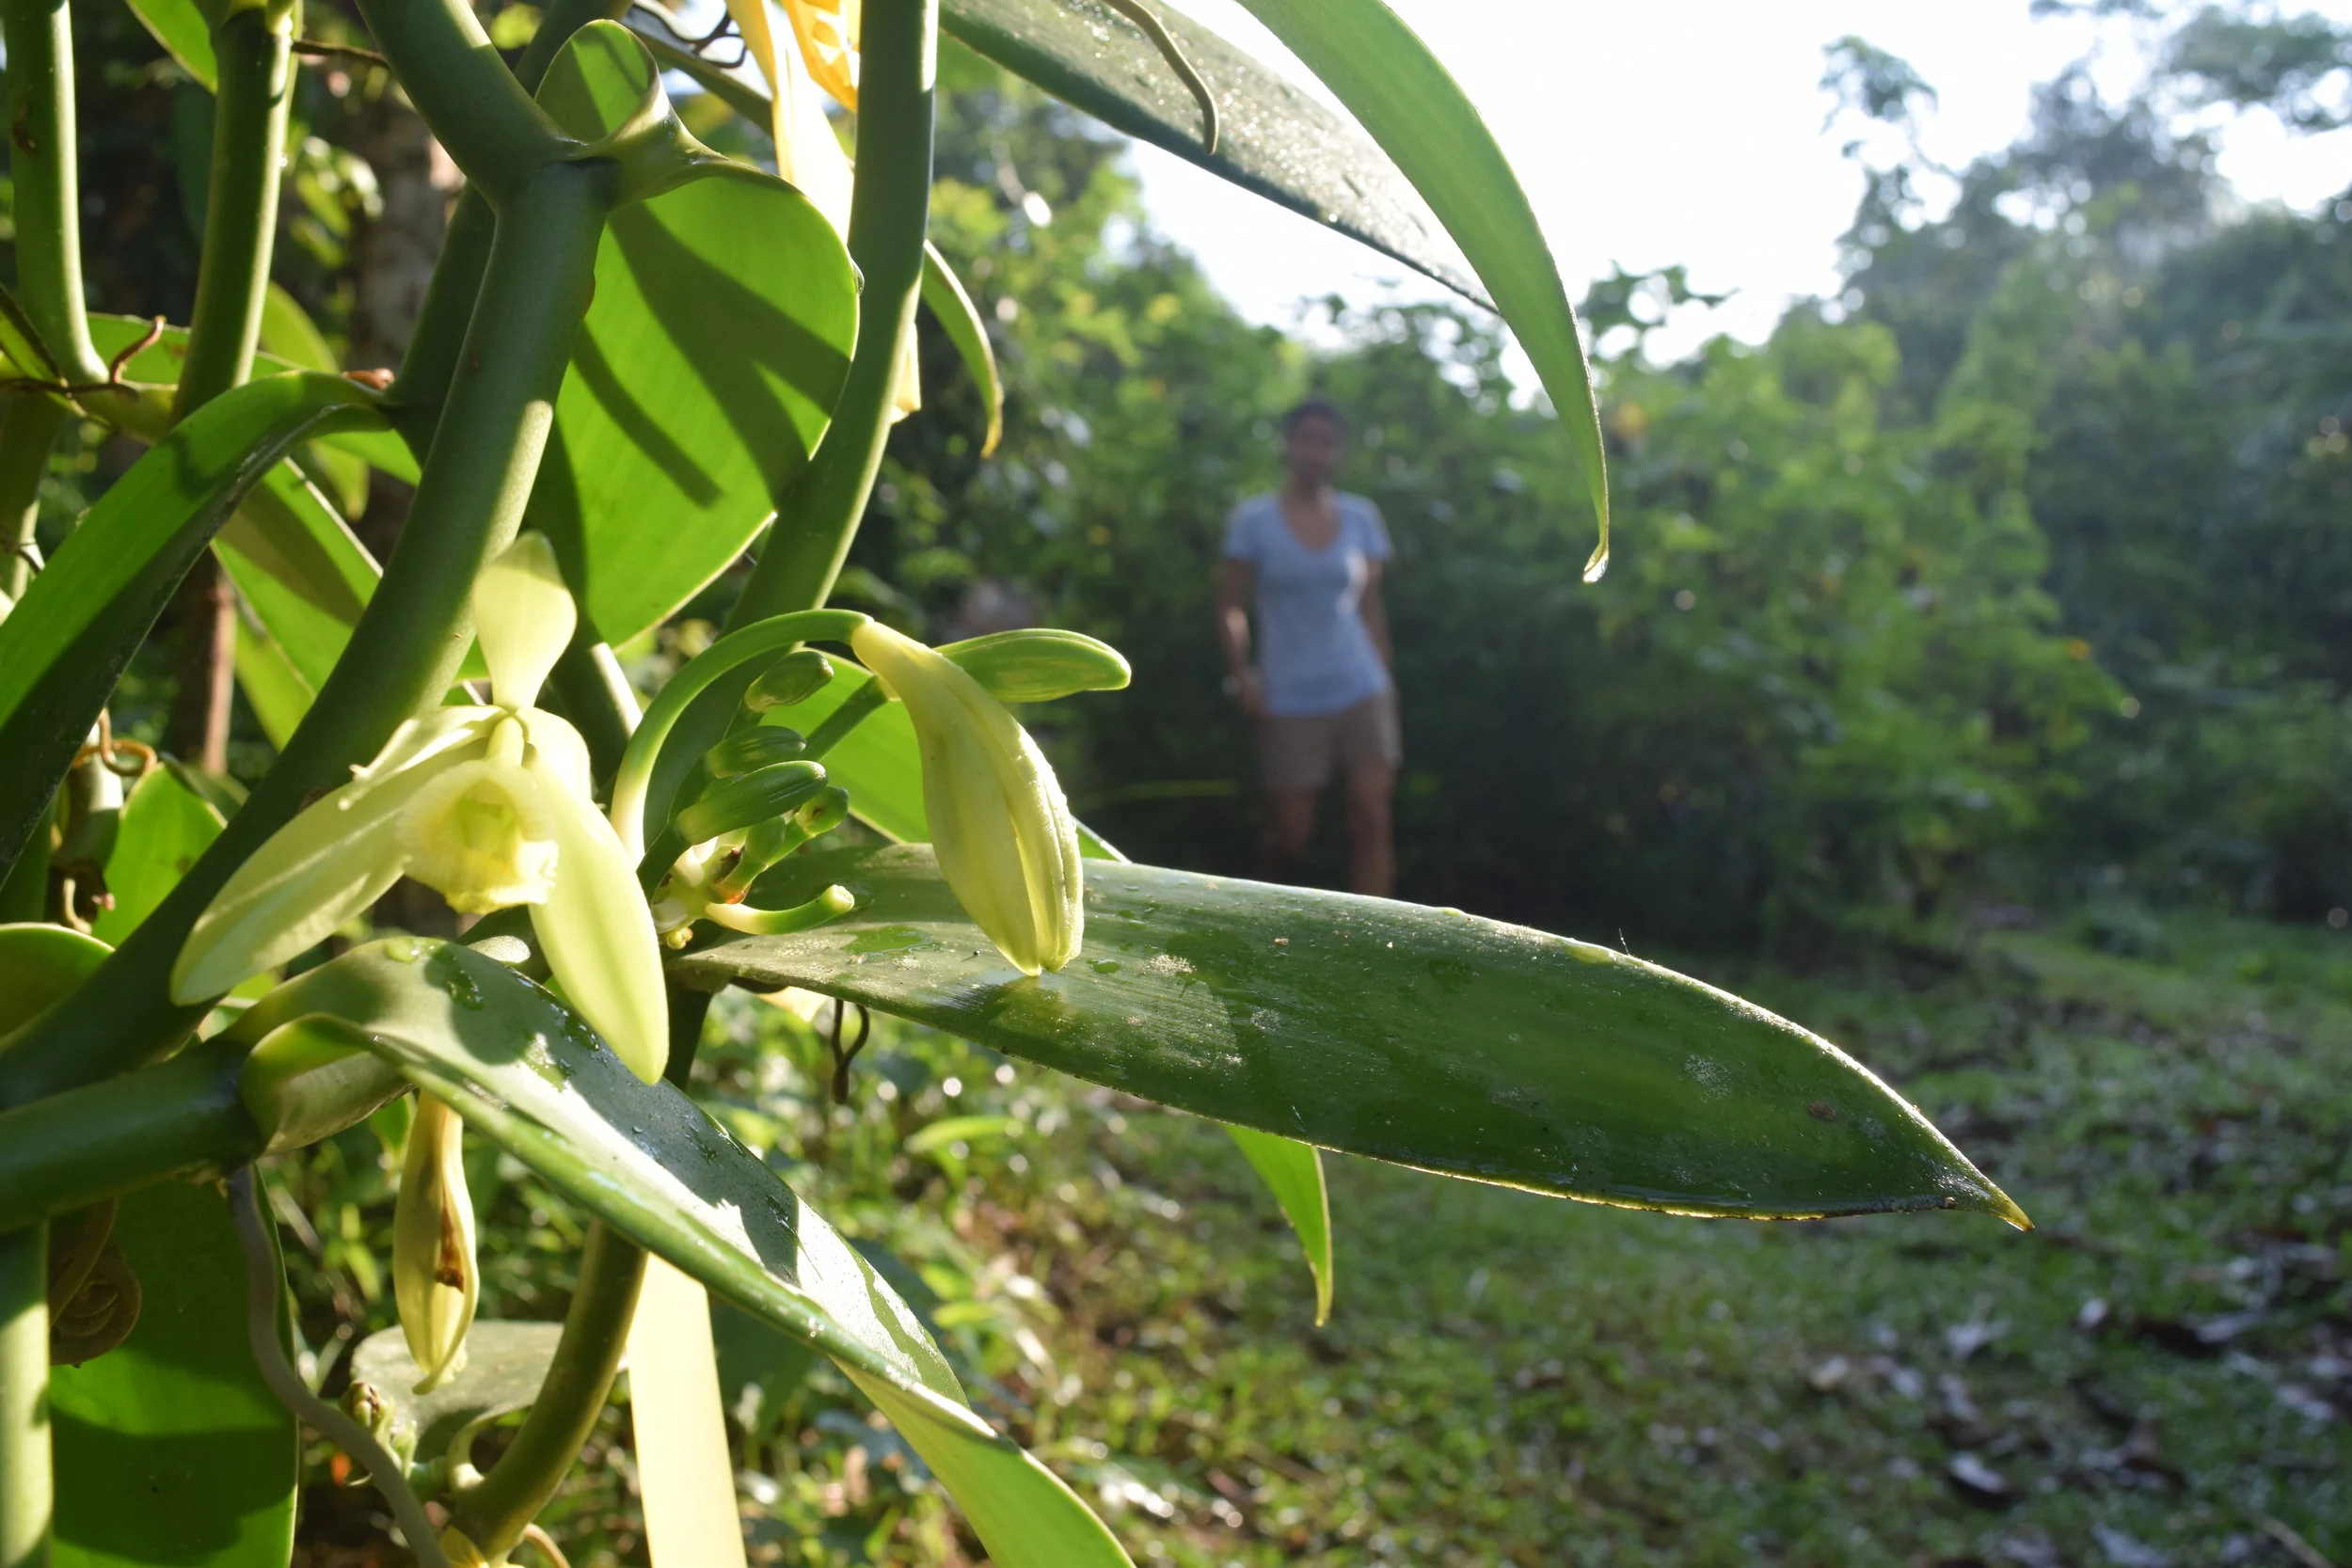
The vanilla orchid (Vanilla planifolia) is one of the world’s most interesting plants. Of the nearly 35,000 species of orchid, the second largest botanical family of plants, vanilla is the only species that produces an edible fruit. True vanilla is a sought after product, usually the second most expensive spice in the world, yet we associate the word vanilla with plain, boring, and commonplace. Native to Mexico and Central America, the vanilla vine is well suited for any tropical homestead. Yet vanilla is a particular plant requiring special care, in particular during pollination where every flower must be hand pollinated.
Hand pollination sounds like a lot of work. However considering the common alternative, synthetic vanilla, which is derived from a combination of wood pulp and coal tar, and is found in a huge amount of processed food;, a little hand pollination is worthwhile.
There is a lot of interest in vanilla at the moment due to apparent global shortages and an extreme jump in crop prices. Like all commodities, the supply and demand of vanilla is subject to many factors outside of simply how much vanilla is produced each year. A powerful contingent of middle men are often accused of driving up prices by hoarding supplies. Keep this in mind if you expect to grow vanilla as a commercial crop.
On the homestead scale, it is much better to have five plants that you give exquisite care than 50 plants that receive marginal care. These five plants will likely out produce the 50 and at less work.
The following is a detailed guide for getting a few plants established and thriving on your tropical homestead. It has been put together with vanilla mentorship from Henry Karczynski of Villa Vanilla and Peter Kring of Finca La Isla. As well, Jorge Salazar of La Iguana Chocolate, and Leon Couturier and Sam Olvera, former Rancho Mastatal apprentices, have been instrumental in co-cultivating our vanilla knowledge. Thank you all for your support in helping our plants flourish.
Henry Karczynski giving a tour of his vanilla plantation.
Climate
Vanilla thrives in the tropical lowlands, both on the Caribbean and pacific slopes of Costa Rica. The vine can support an extended dry season of up to three months. It wants a minimum of 3000 mm of rainfall, or can be irrigated on a small scale, and is rarely grown commercially above an elevation of 600 meters. It is native to the lowland forests, where it thrives as an understory vine that climbs its way toward the canopy.
Design and Establishment
Propagation
Vanilla is an easy plant to propagate. A cutting from a mature plant, with 12 to 24 nodes or 1 to 1.5 meters long, is all that is needed to start a young vine of your own. The longer the cutting the faster it will produce flowers.
Be sure to take cuttings only from healthy plants that appears free from disease and don’t take too much from any one plant, as it will set back any future flowering by at least one year.
The cuttings are very hardy and can survive in a shady moist place for many weeks until you are ready to plant them. Be sure to keep the cuttings out of the sun.
Siting, Layout and Spacing
On a commercial scale vanilla is typically spaced on a grid of 2.5 m x 2.5 m. This leaves ample space to walk around each individual plant and quickly assess the flowering situation. On a homestead scale, vanilla can be planted closer. A 1.5 m spacing along a row would be a minimum as it is still important that you can move around each plant.
A well cared for vanilla plantation at Villa Vanilla outside of Quepos, Costa Rica.
Vanilla is similar to cacao and black pepper in that desires around a 50% sun to shade ratio. Consider a location with existing shade cover that is either very high in elevation, letting in more light from the sides, or can be pruned to achieve the optimal sun/shade ratio. If your rainy season is short (less than one month), strive for more sunlight. If your rainy season is distinct (three or more months) enough dry season shade is very important. If you will be establishing vanilla while also establishing shade trees, it is important to provide short term shade species as well. Short term shade species might include pigeon pea (Cajanus cajan), bananas (Musa sp.), and Mexican sunflower (Tithonia diversifolia). These can be pruned in the rainy season and allowed to grow out during the dry season.
The primary shade for vanilla crops will come from the support species that they grow on. The selection, planting, and management of the support species is nearly as important as the care of the vanilla vine itself. Support species are most often planted as a living post or cerca viva. A two meter long post, 8 to 10 cm in diameter with a few smaller bifurcating branches is ideal. The most commonly used species are madero negro (Gliricida sepium) and poro (Erythrina sp.). Starting posts from seeds requires more planning, but will result in a more robust post material. Different guava species (Inga sp) that are best suited to your particular climate, such as edulis or osterdiana, would be appropriate.
An excellent vanilla support post allows the vine to hang comfortably.
Ideally living posts are established one year before the vanilla plants are to be transplanted. Planting in advance gives the posts the chance to root in before the vines grow to a significant weight. It will also let you replant the posts that did not successfully transplant. Any support started from seed should be around five centimeters in diameter before a vine is placed on it. Throughout the tropics there is ample local knowledge on the selection, planting, and management of living posts. Follow your local neighbors’ advice on when to cut and plant a post.
Planting Out
Vanilla should be planted out once posts are established and at the beginning of the rainy season. A few nodes at the base of the vine should be buried under an ample pile of woody mulch. The rest of the vine should be tied to the living post or if long enough draped over the branches. Tying parts of the vine, around nodes, to the trunk will encourage aerial roots to form and connect to the support post. Flagging tape is excellent for this task as it can stretch as the vanilla grows and is less likely to damage the vine than string or cordage.
Intercropping
In many ways vanilla inter-crops with other species very well but it does have specific limitations. The roots of vanilla are very susceptible to disturbance. Animals, in particular chickens, do not mix well with vanilla. Neither do tuber crops, whose harvest creates a disturbance when planted close to the base of the support species. Vanilla roots don’t extend far from the support species though, so other crops can be planted nearby. The selected shade trees can also be productive trees. Pili nut (Canarium ovatum), Tahitian chestnut (Inocarpus edulis), Maya nut (Brosimum alicastrum) are all excellent nut trees that would eventually provide a tall canopy over a mature vanilla grove.
Vanilla roots working their way into the mulch layer.
Management
Guiding
Vanilla benefits greatly from a regular schedule to guide the vines. Once per week the plants should be checked for any vines that are trying to climb high, run along the ground or reaching for other plants. These vines need to be tucked back toward the living posts or draped around the branches of the post. The idea is to slowly create a figure eight with the vine, draping it back over itself.
Vanilla plants won’t flower well if they only climb upwards and if they do, the flowers will be out of reach.
Pruning
The living posts will need to be pruned once or twice a year. Pruning will allow you to manage sunlight and shade during the rainy and dry seasons, to provide mulch for the vanilla plants, and to eliminate tall branches that the vanilla wants to climb.
Pruned material should be cut into smaller chunks and place gently around the base of the support where the vanilla roots can access the material as it decomposes.
Watering
If you have an extended dry season then occasionally irrigating throughout this period will significantly enhance flowering. Shade, mulch and irrigation work together to allow vanilla to be grown in parts of the country that have a longer dry season such as Guanacaste.
Pollination
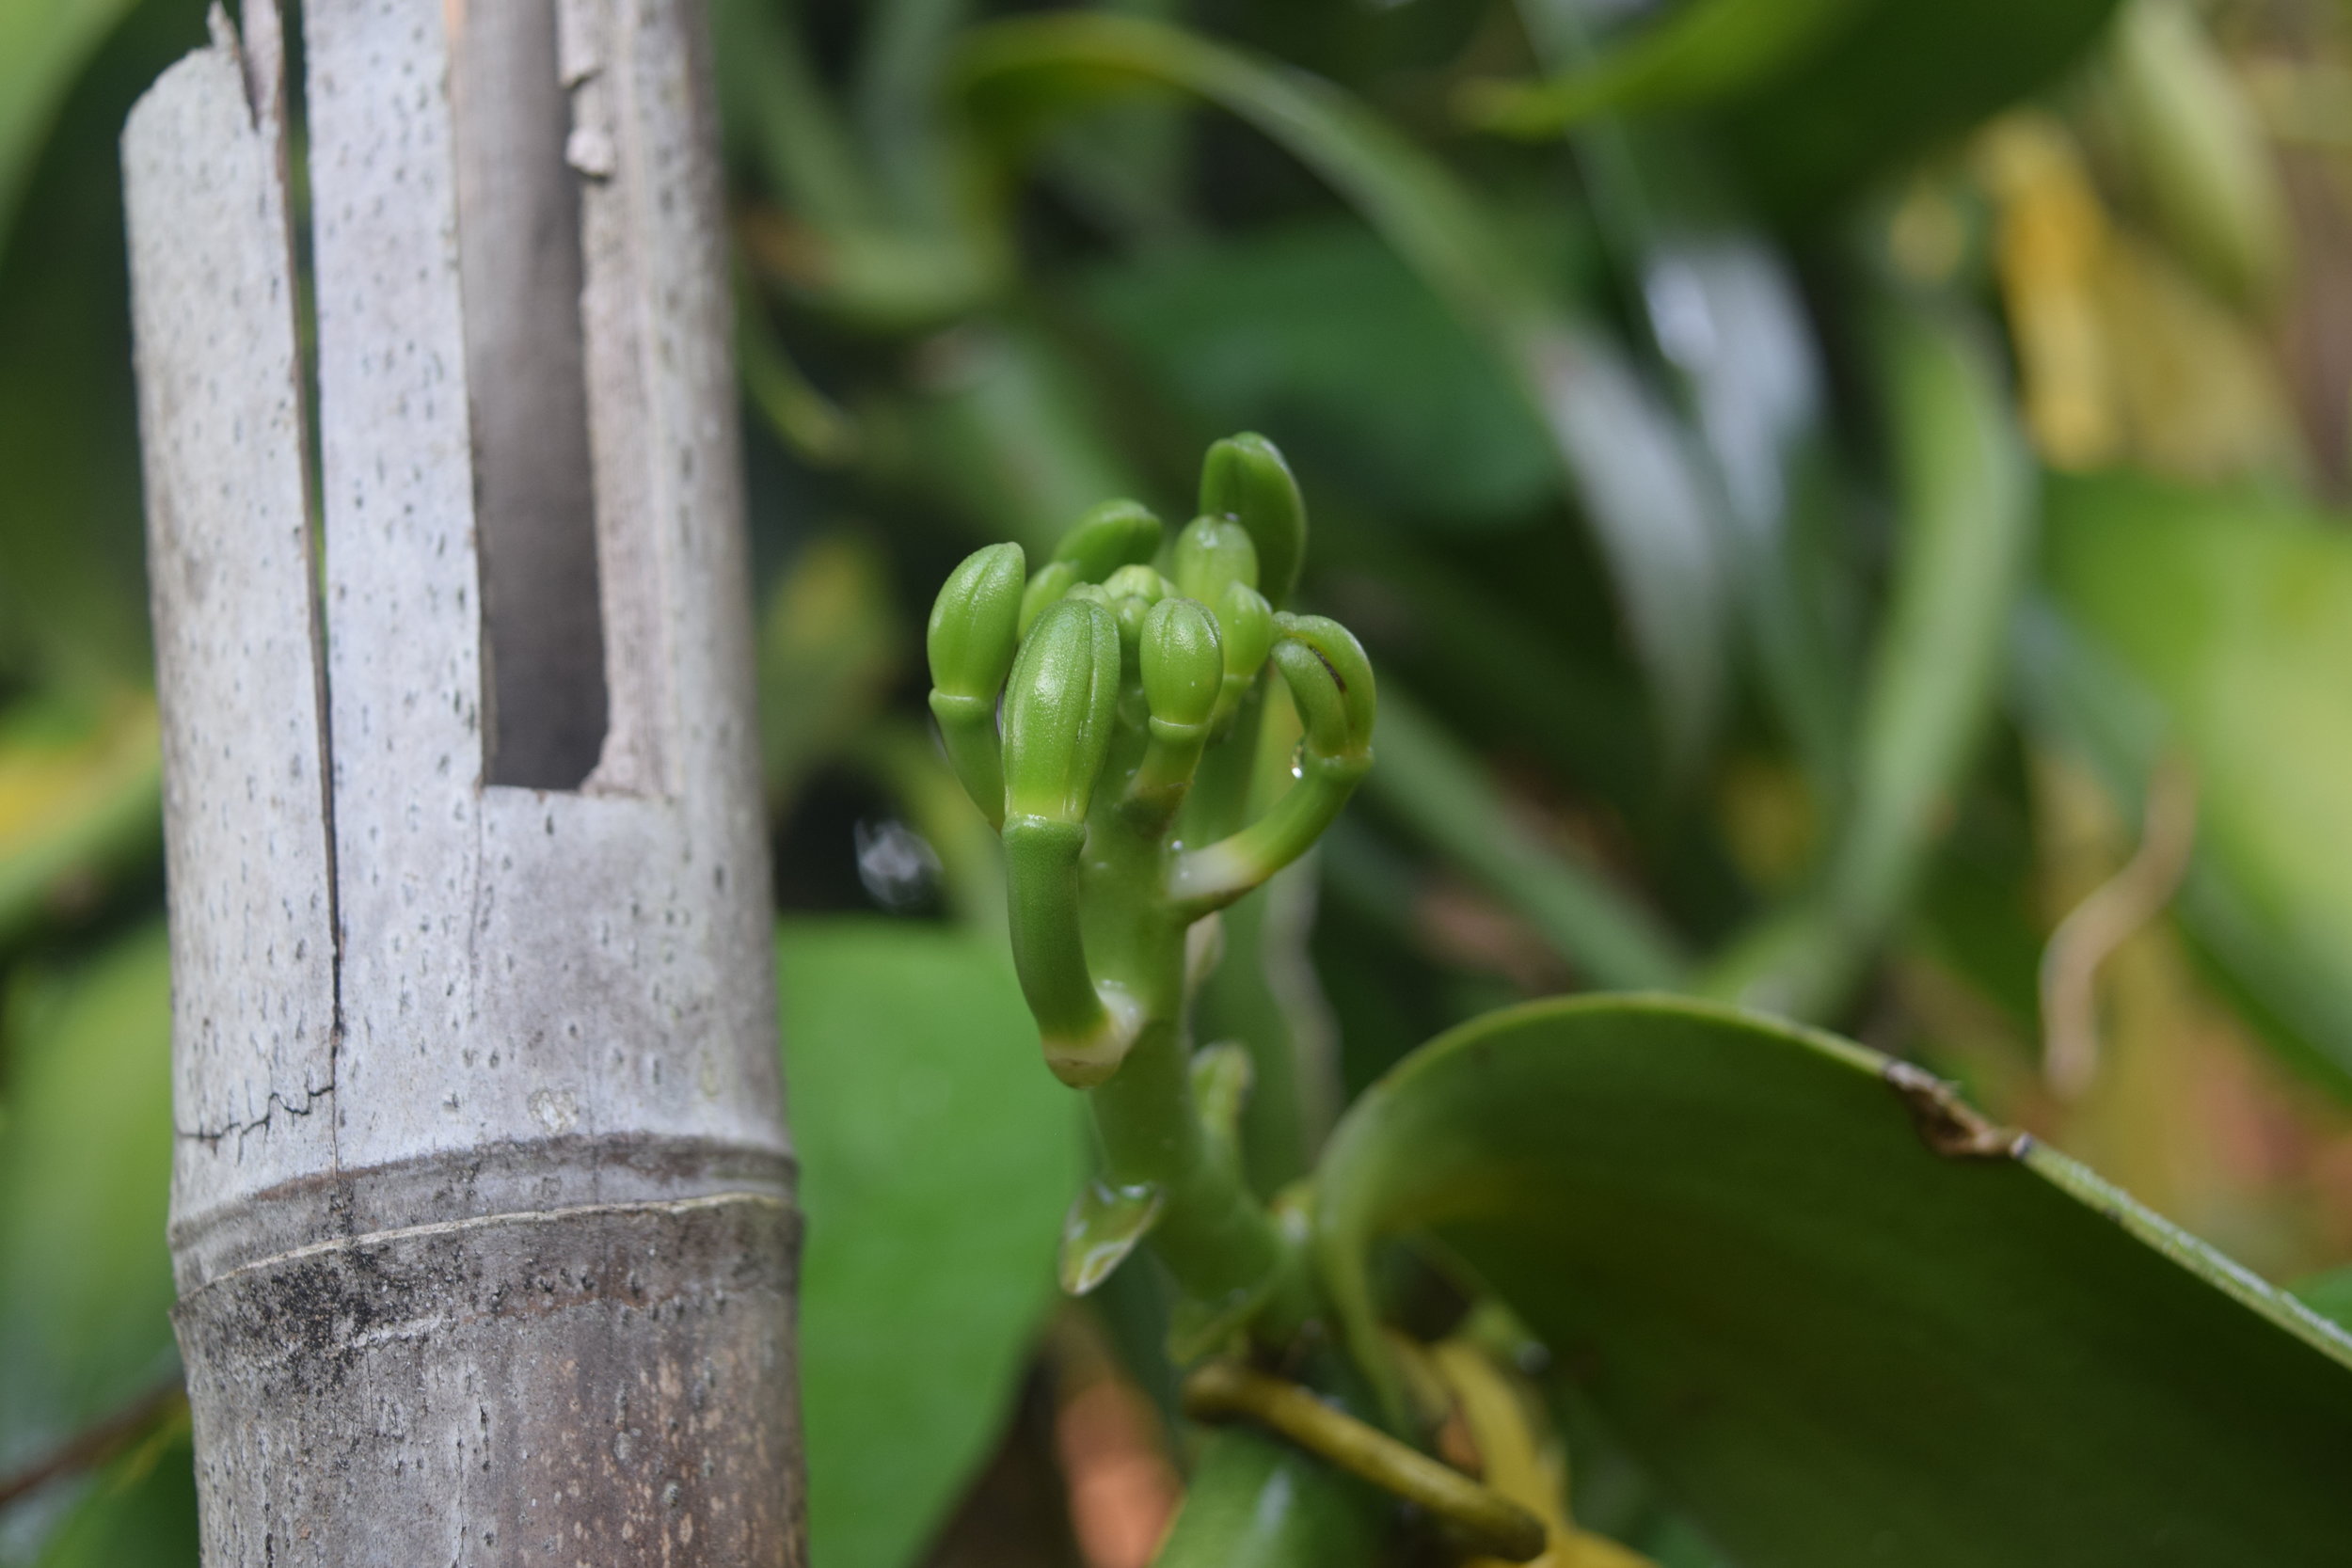
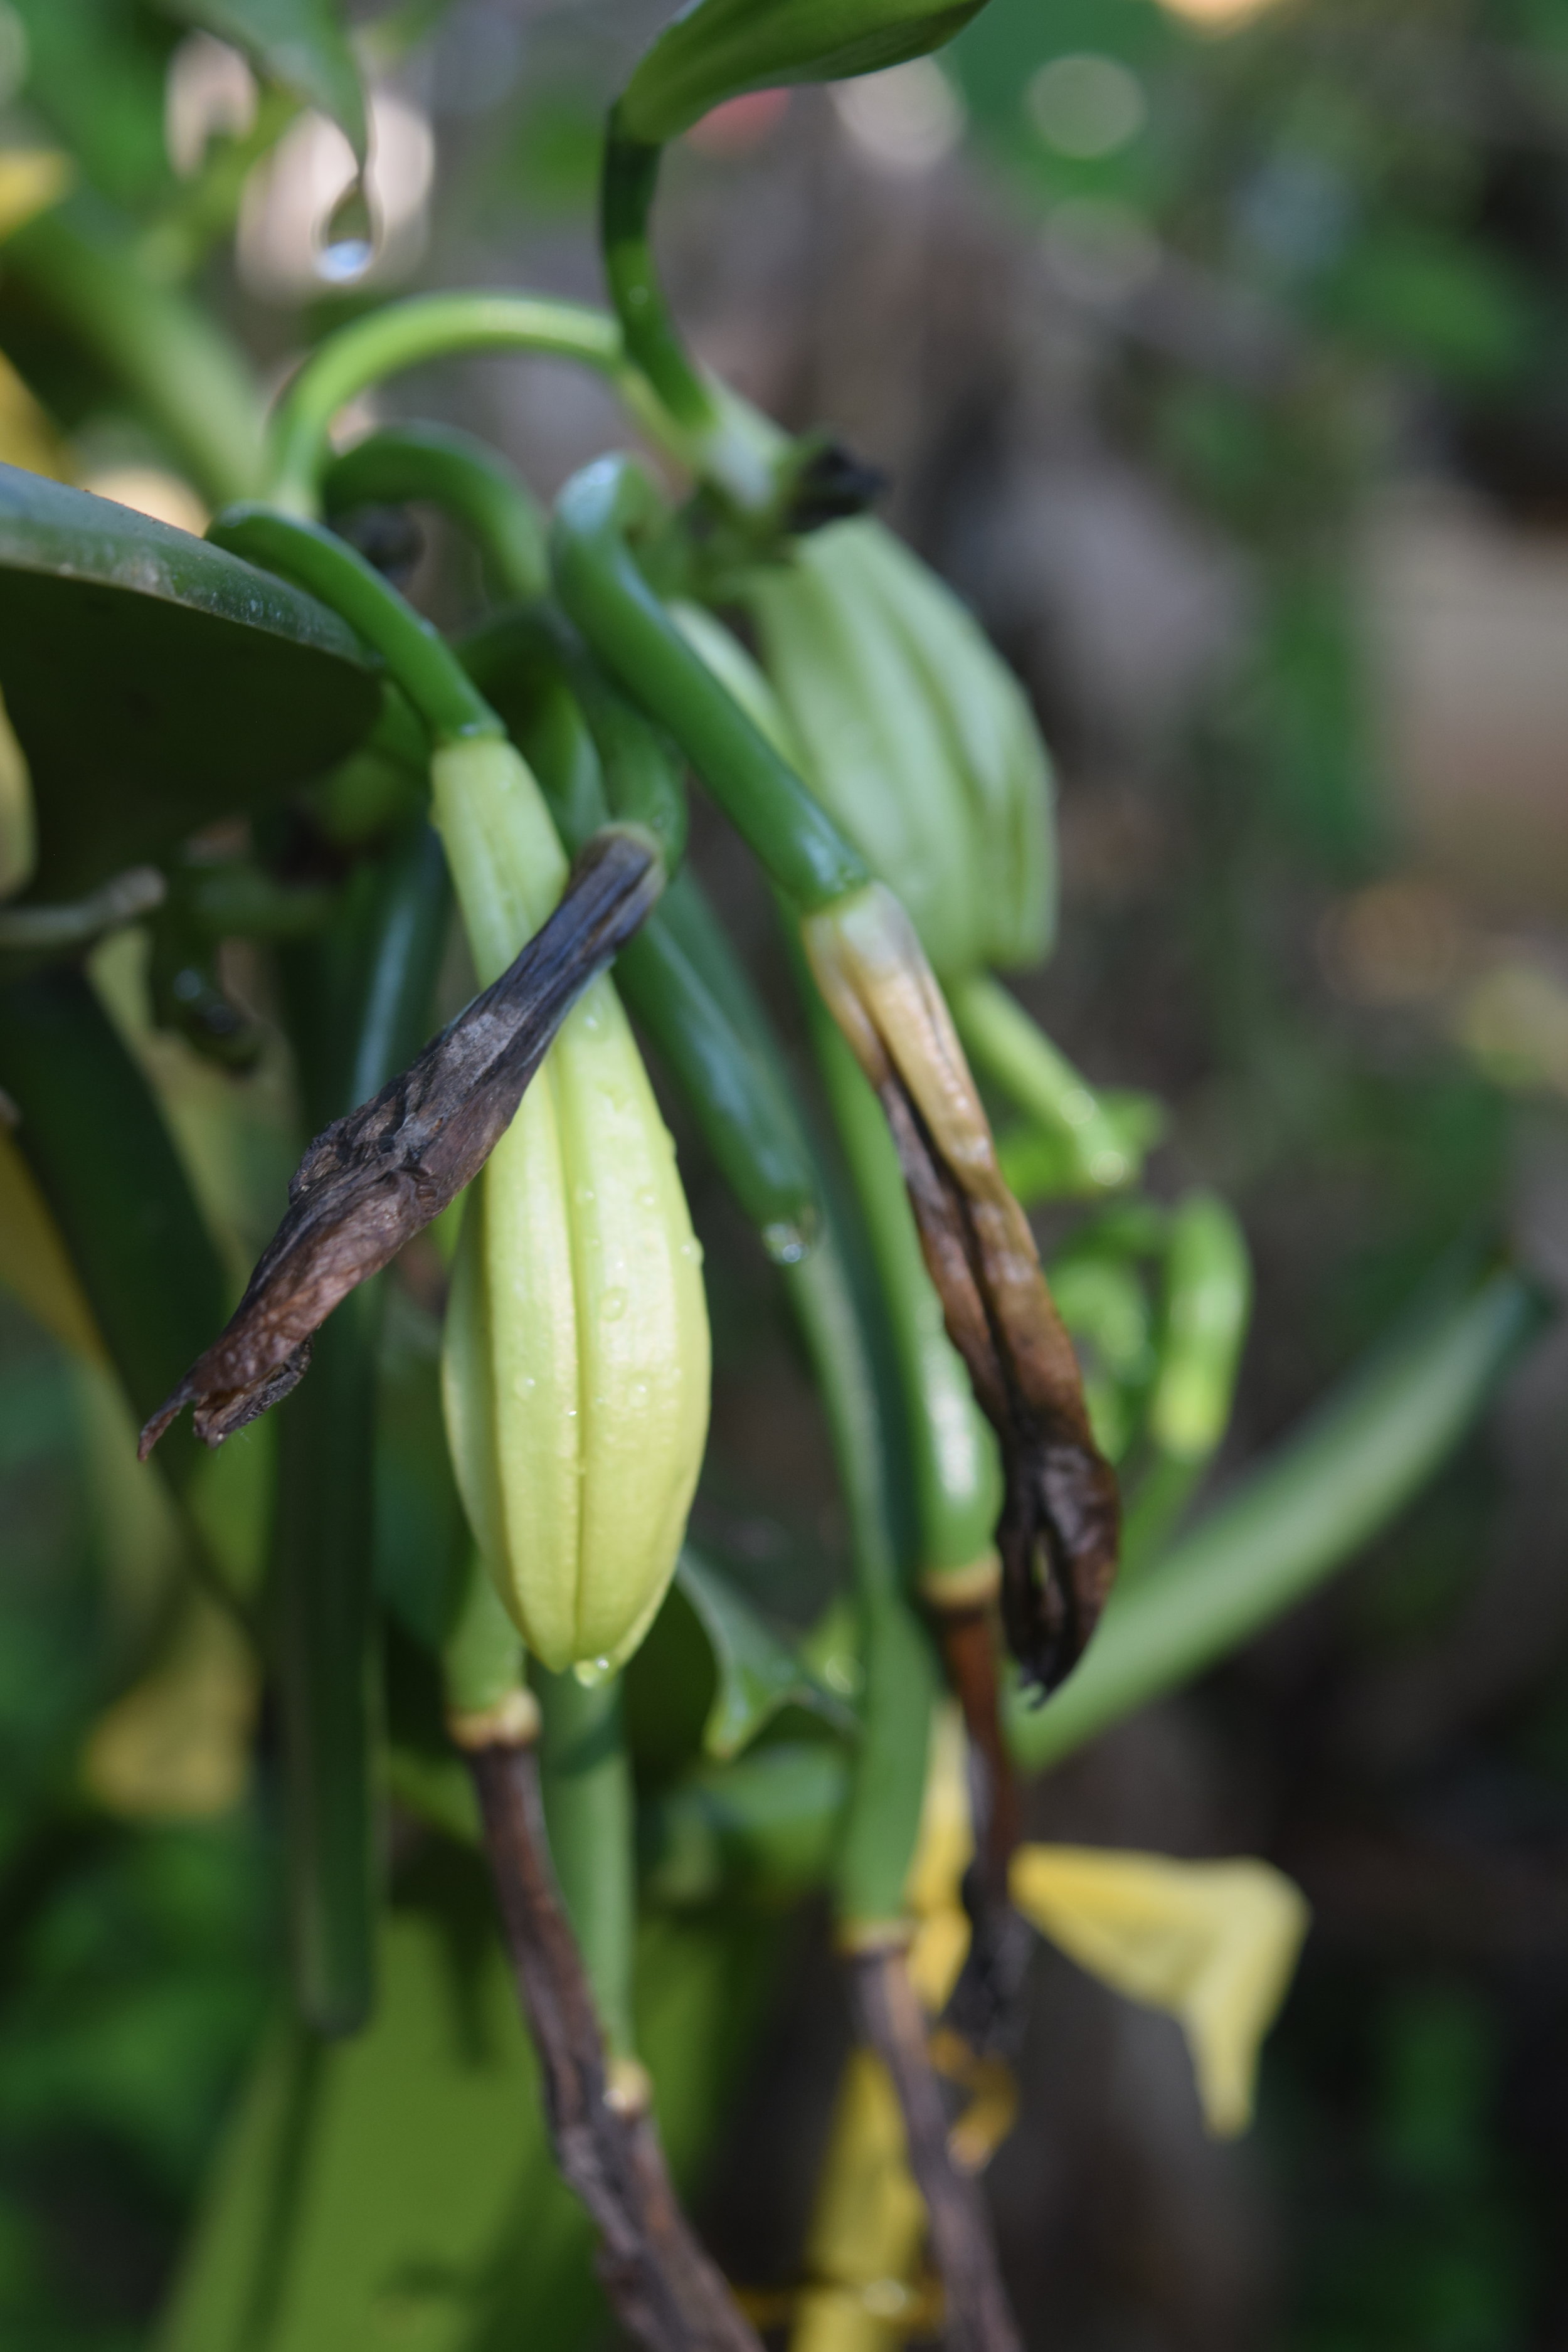
The key to vanilla is successful pollination of the flower. The flowers typically appear during the drier times of year and are triggered by the lack of rainfall. They form in clusters of around 15 flowers, with only one flower opening each day. The flowers open for no more than 8 hours and are best pollinated early in the morning. If you succeed at pollination, the flower will dry up but remain attached to the vine; if it was not successful the flower will fall off within 24 hours.
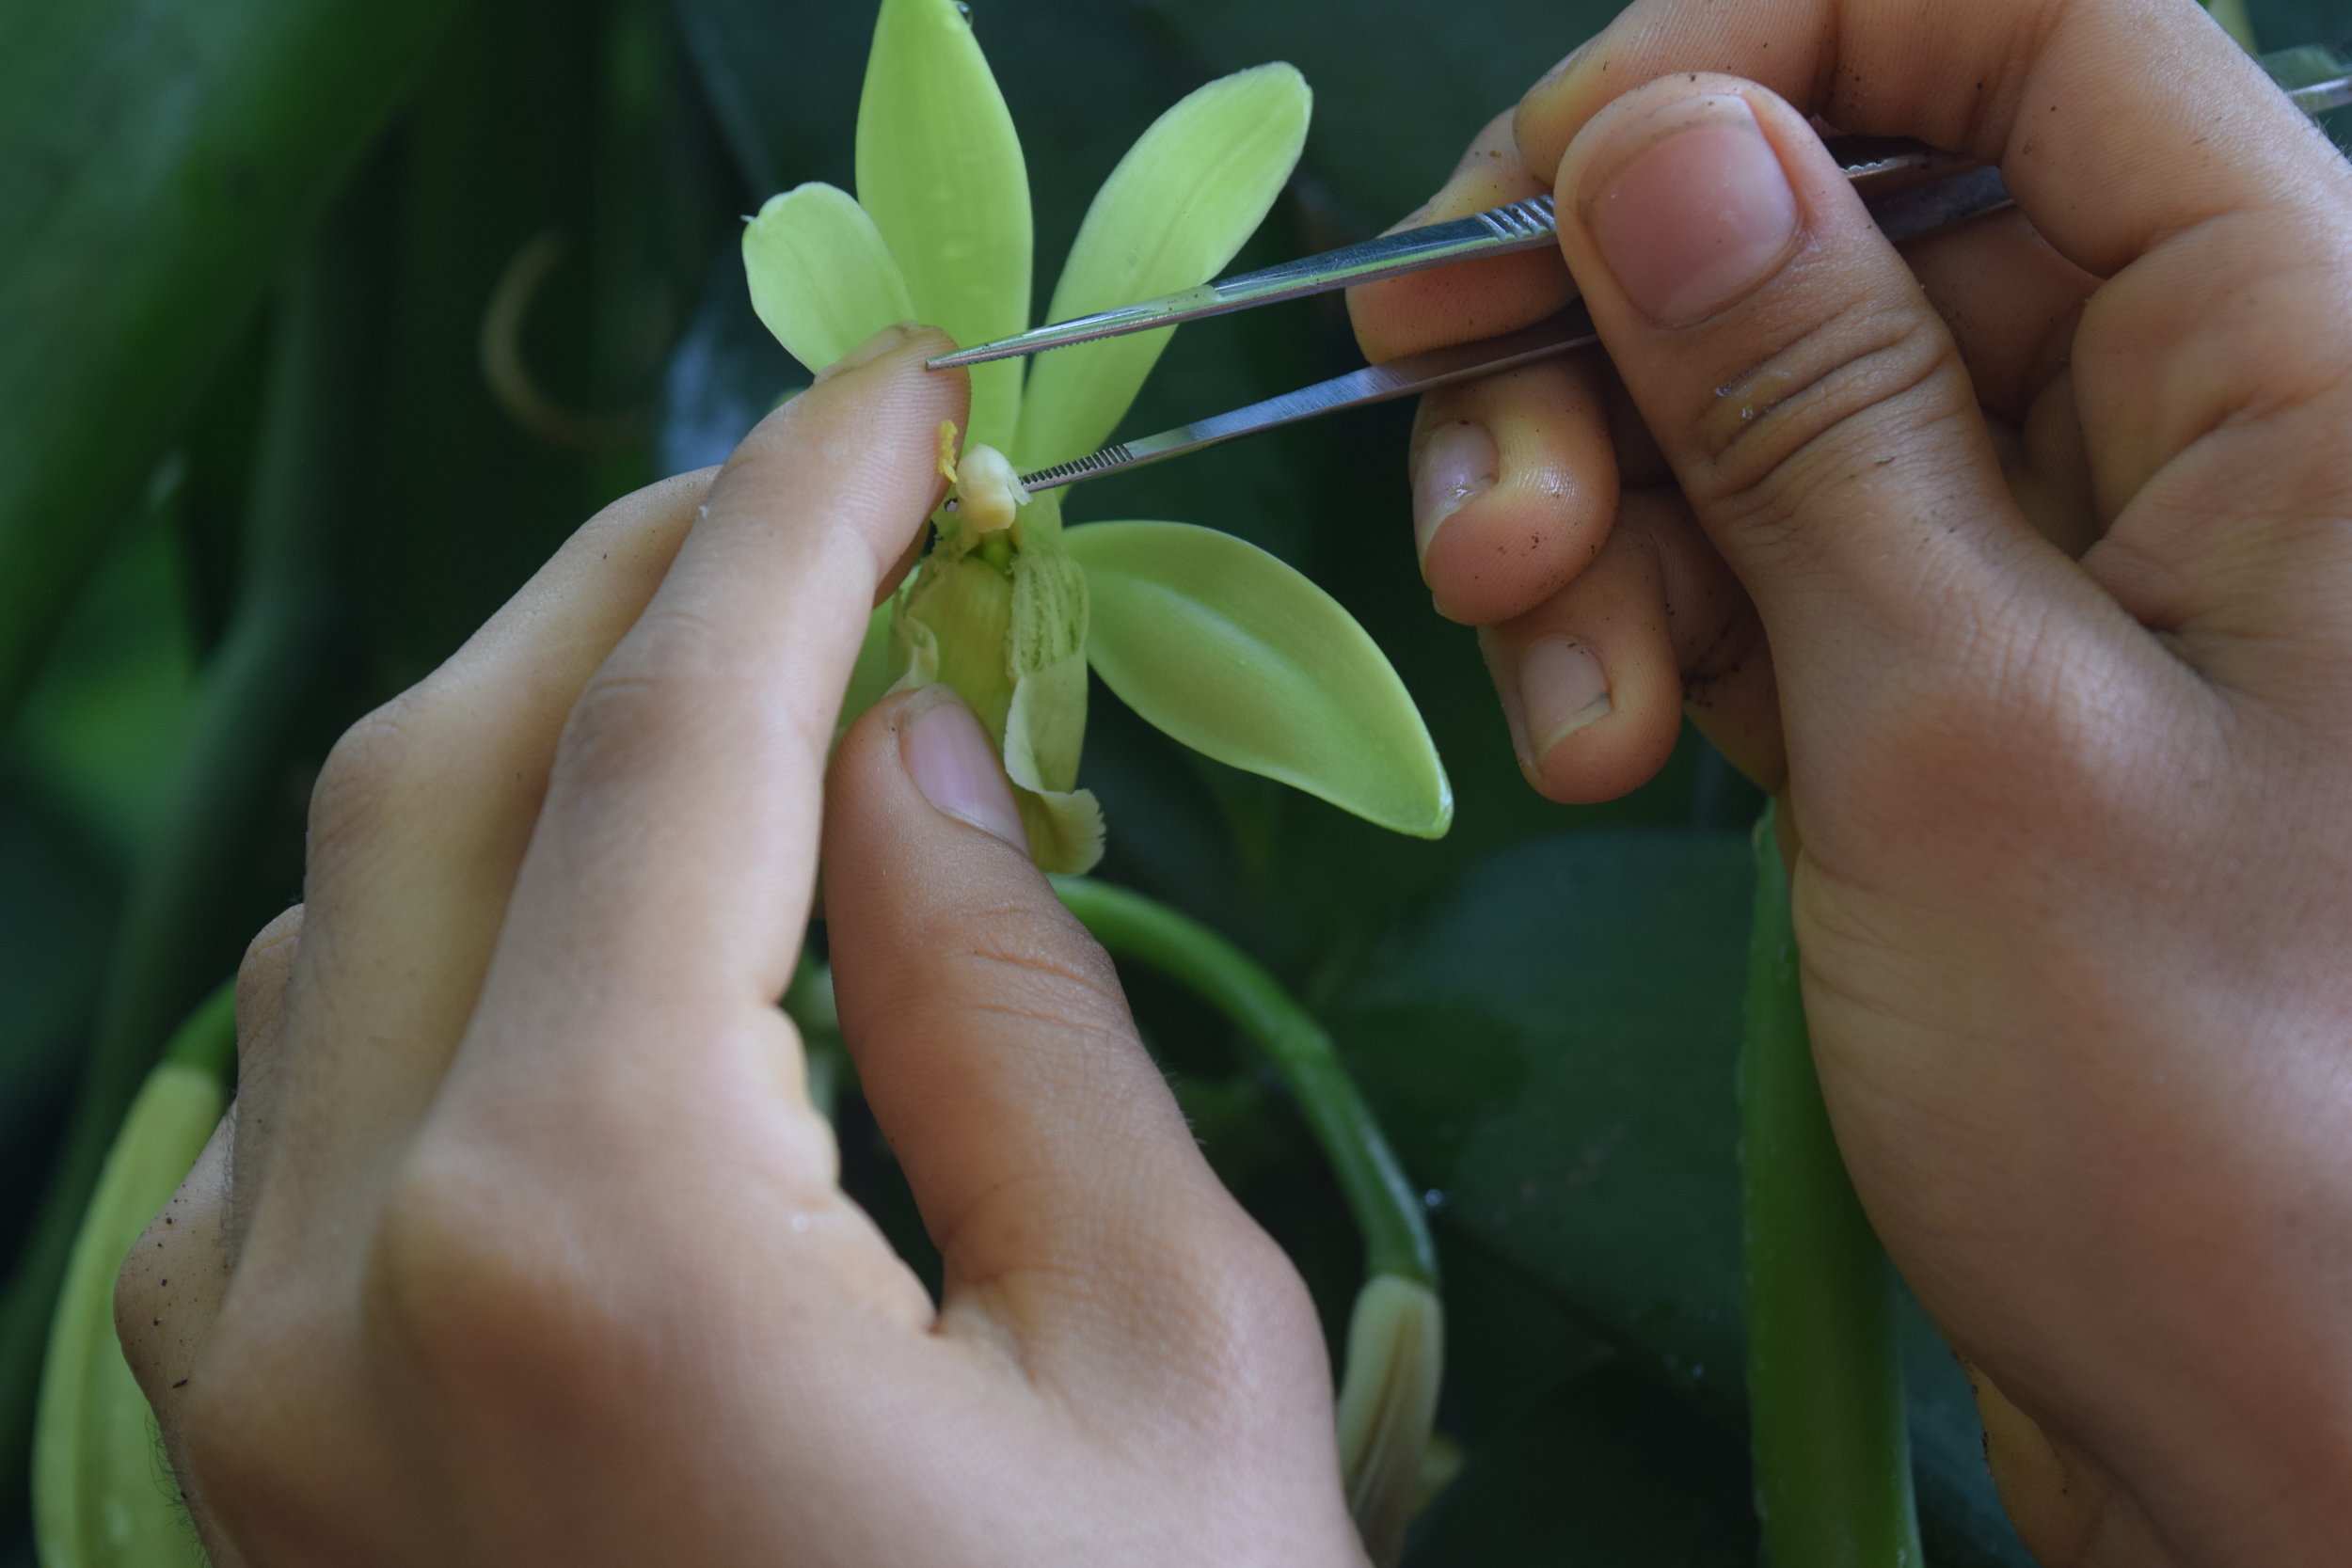
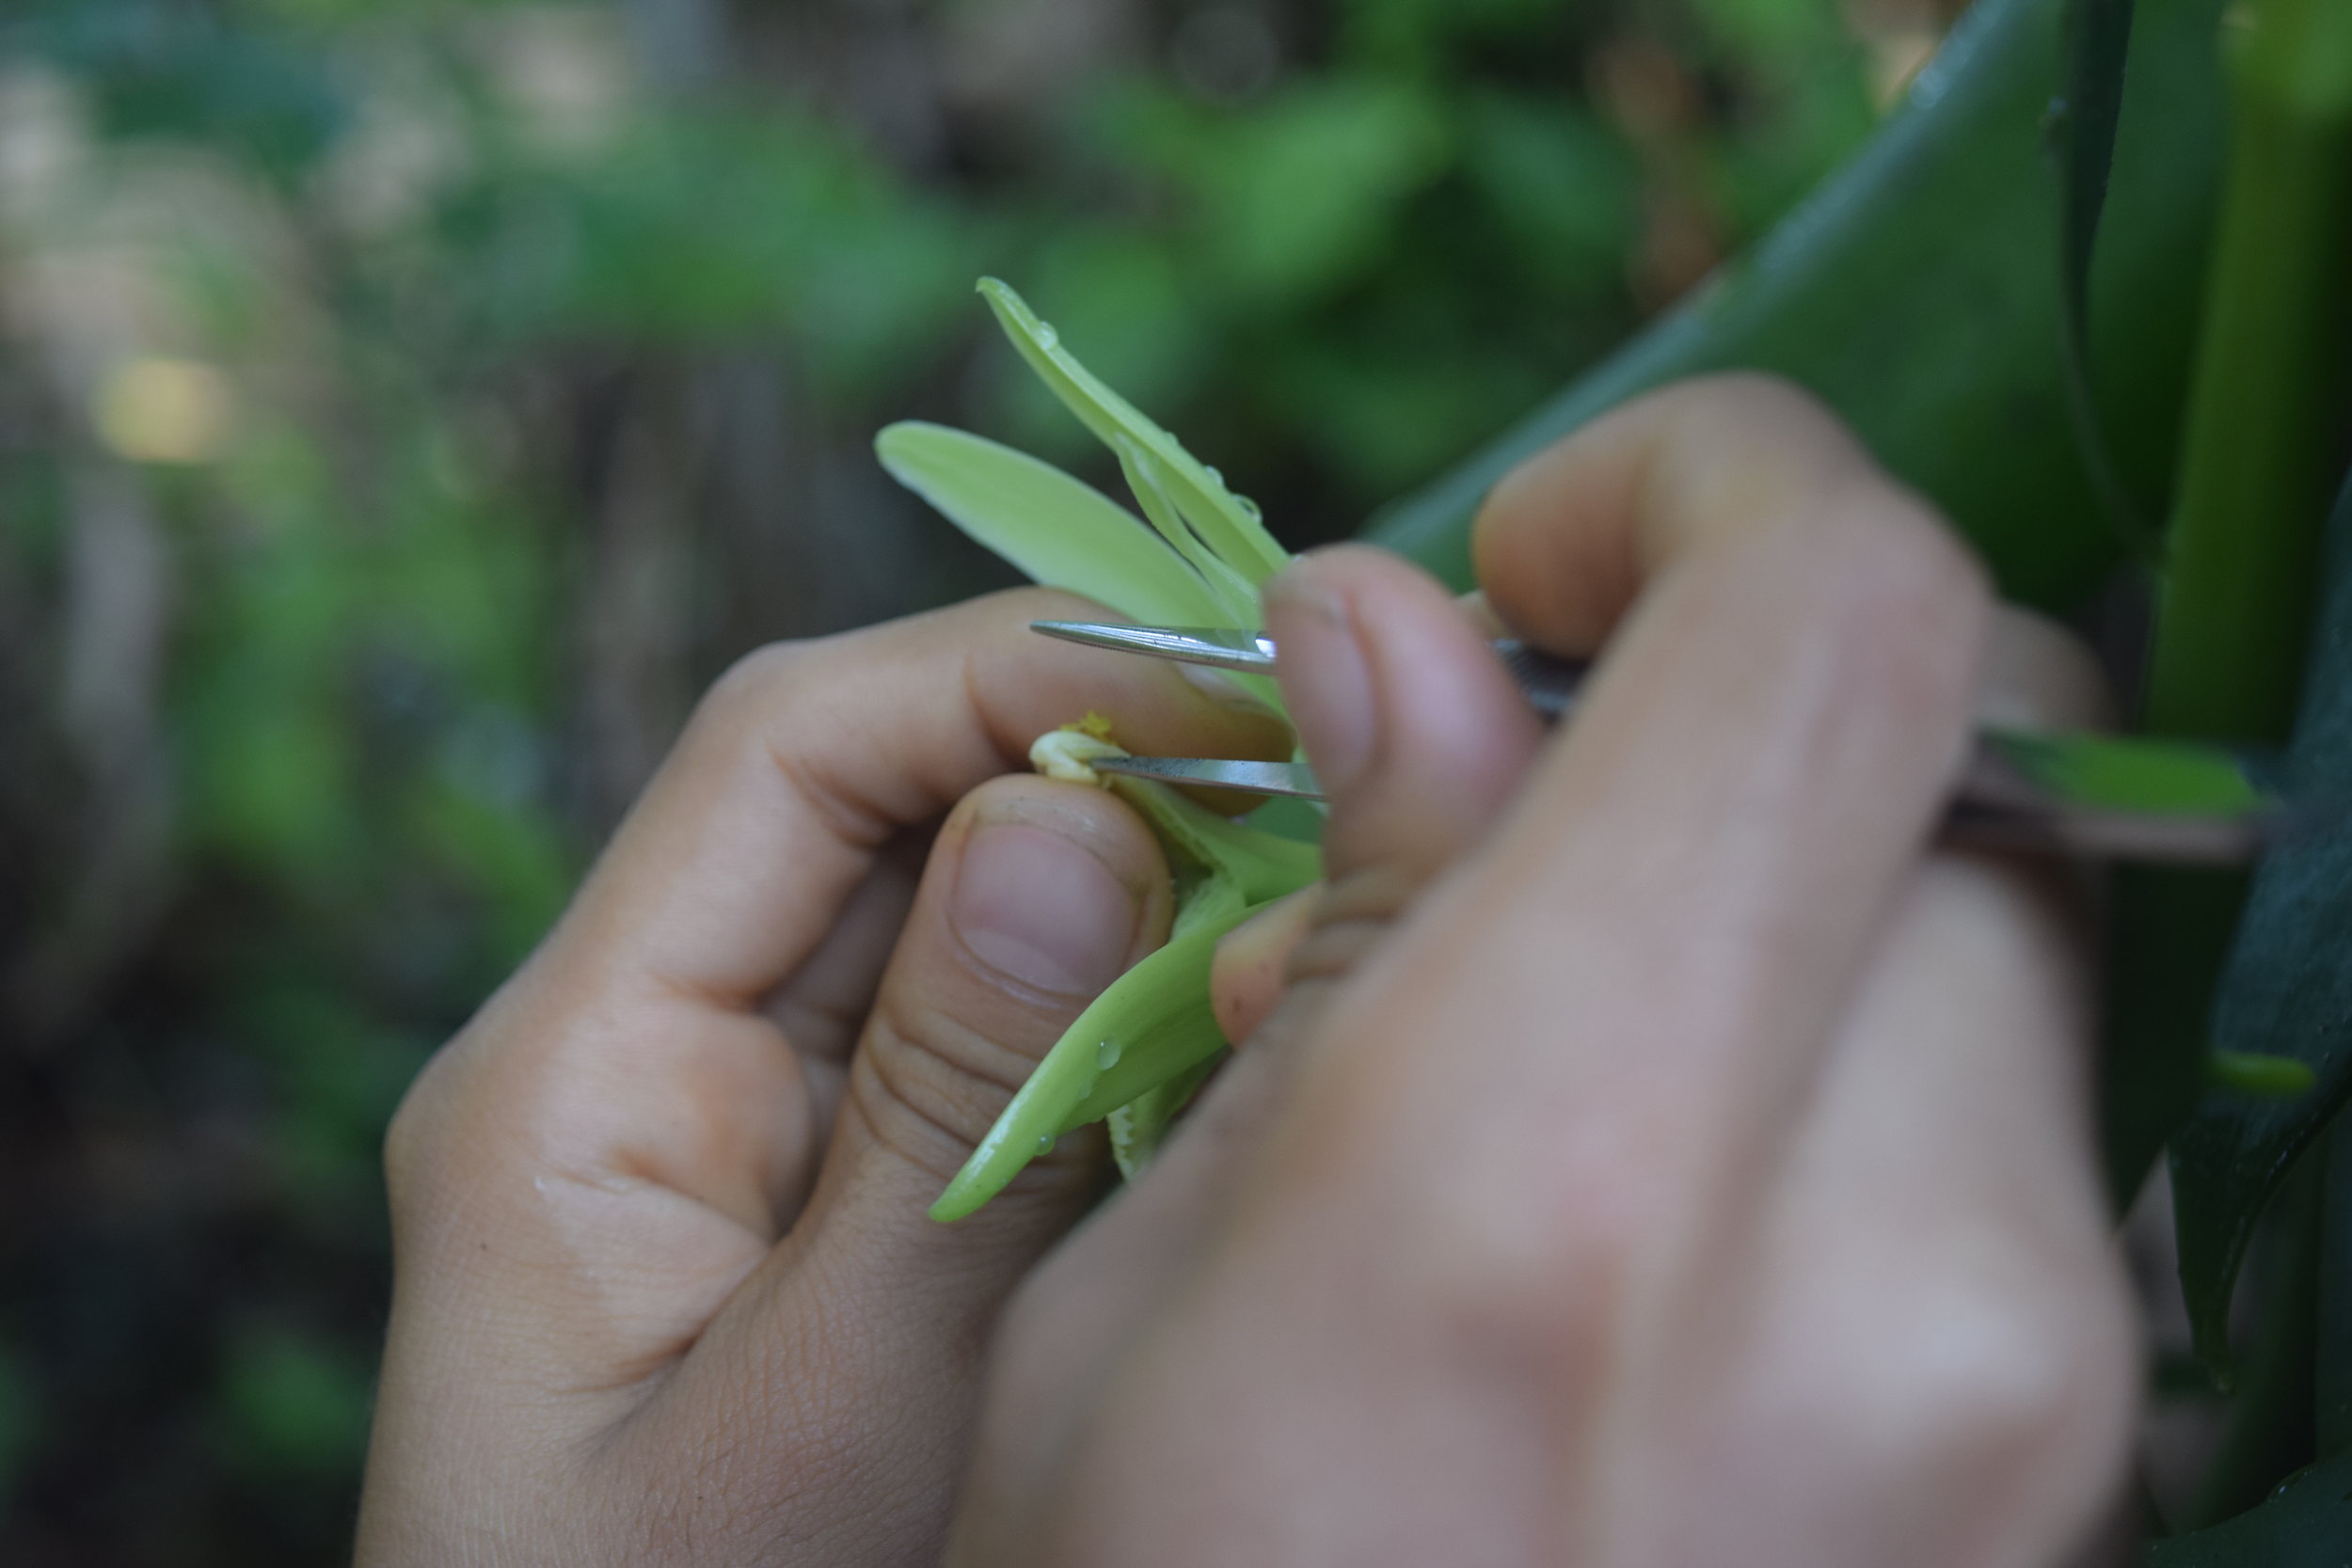
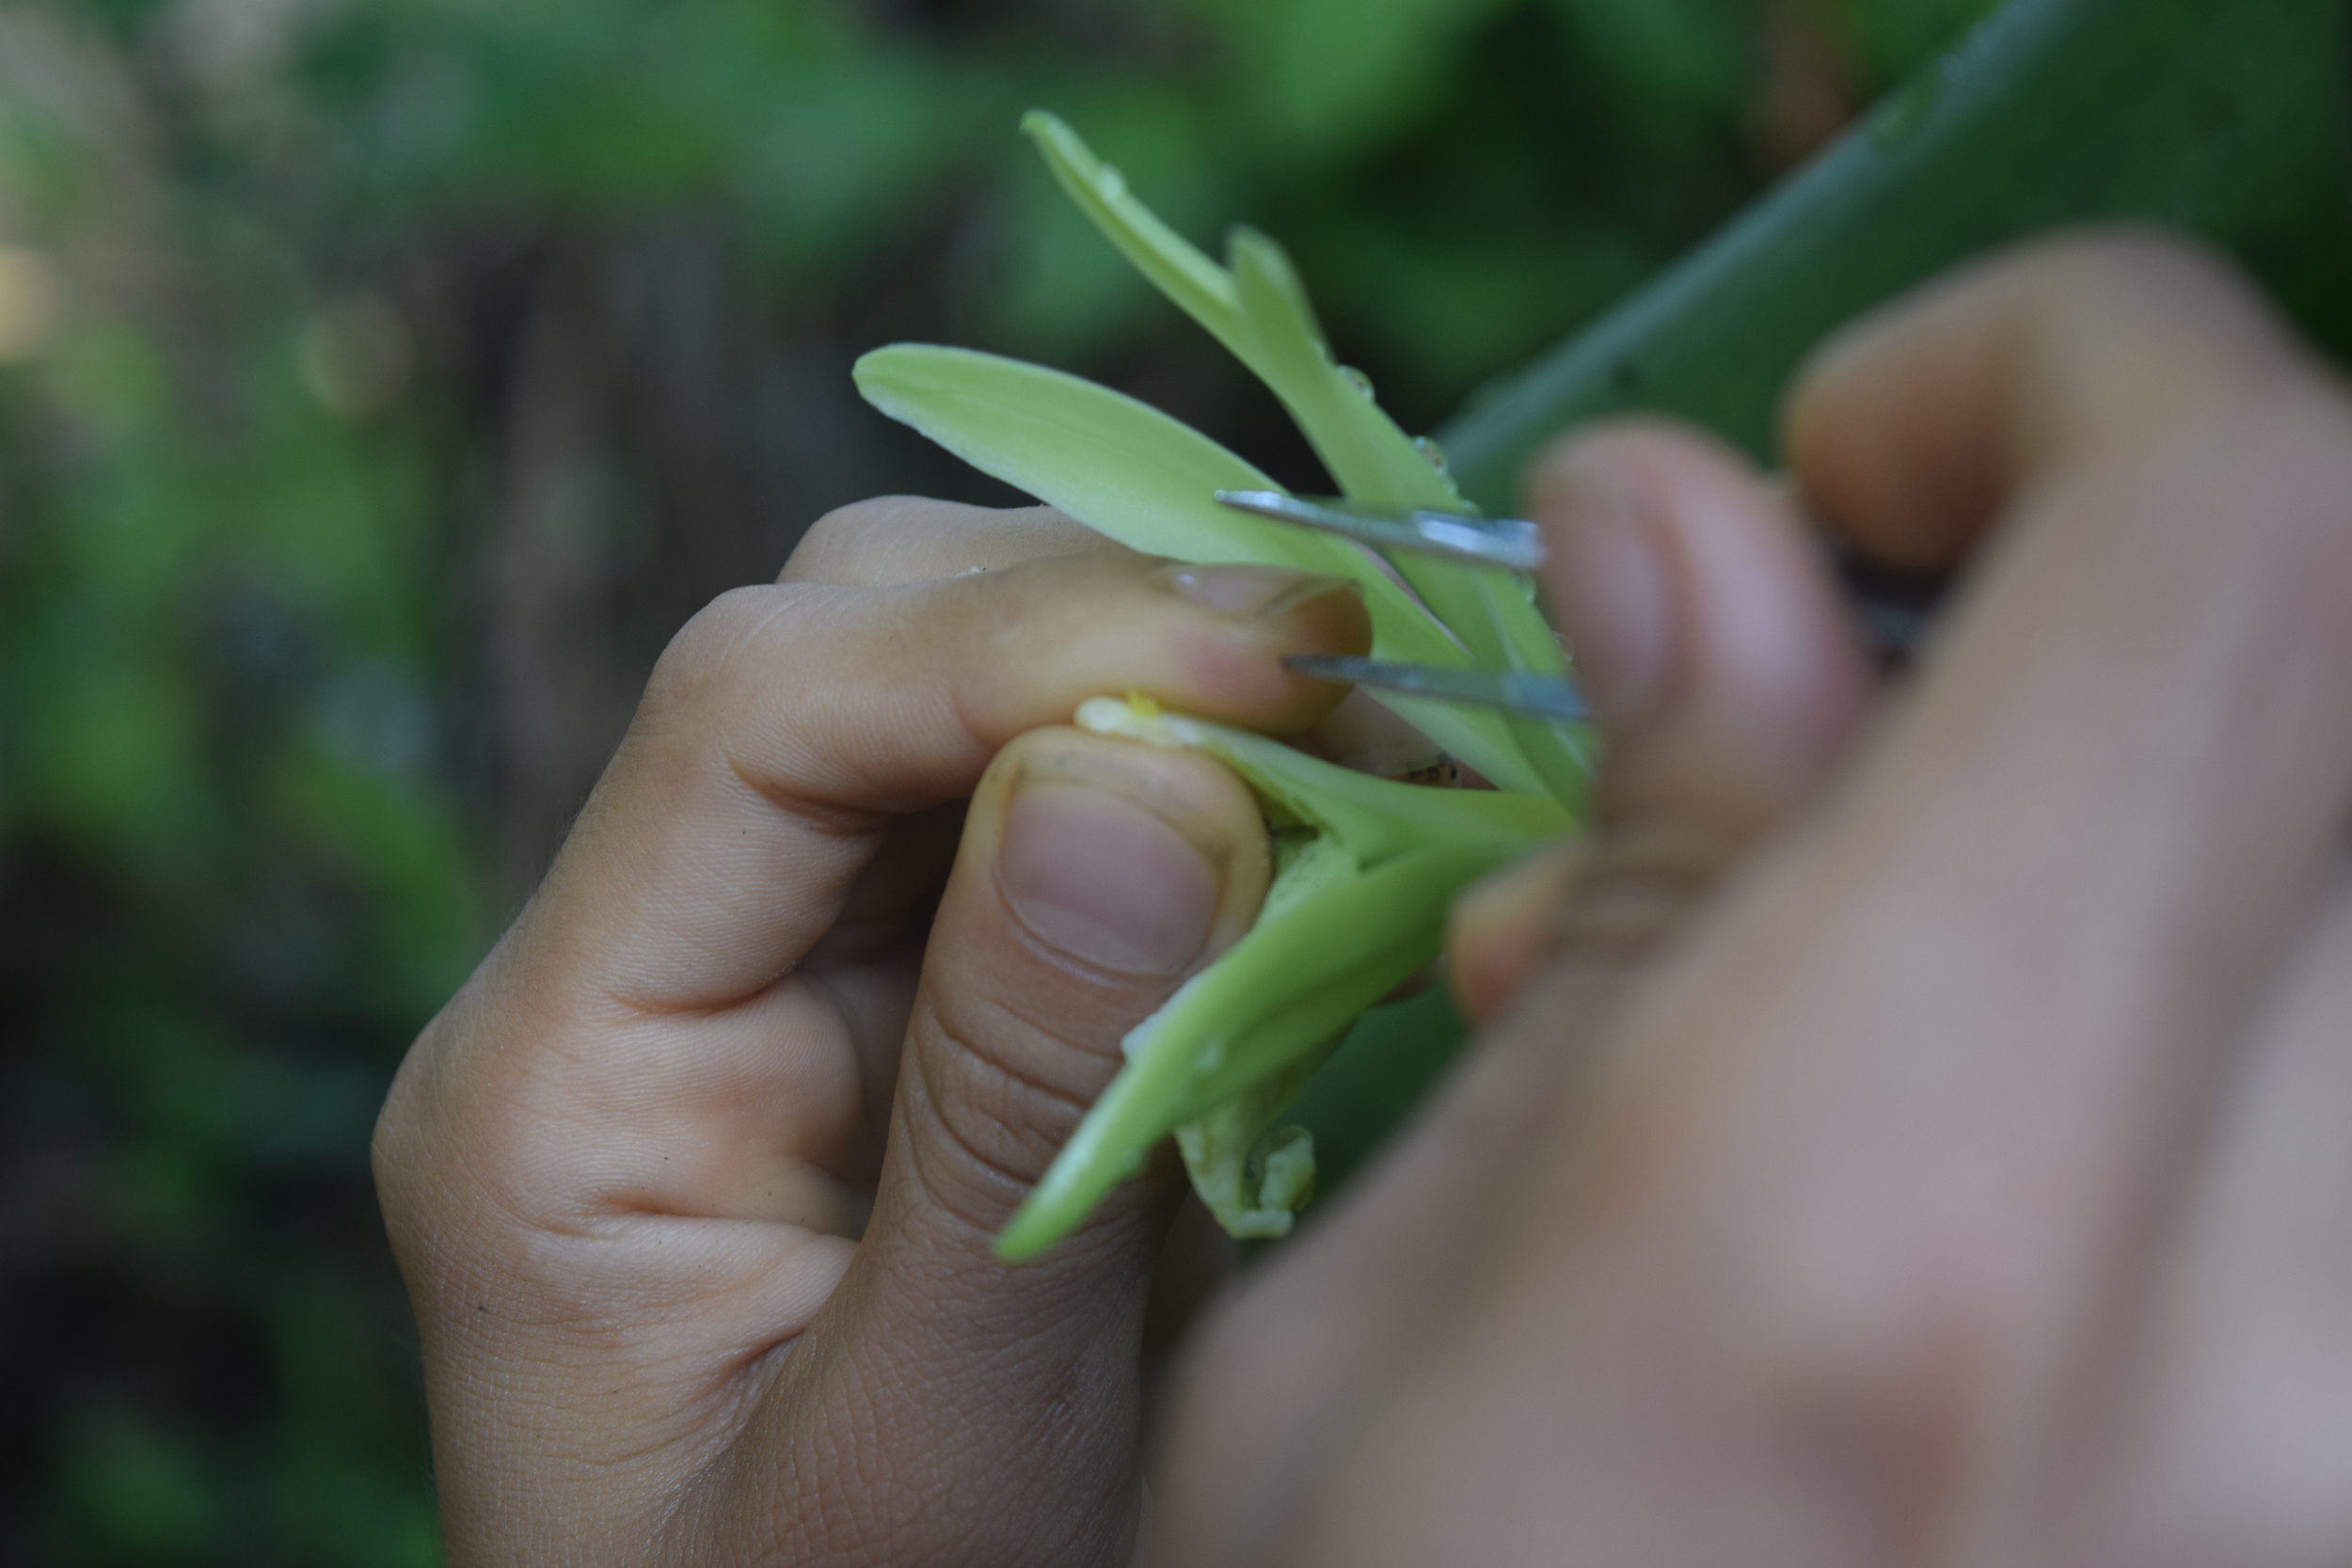
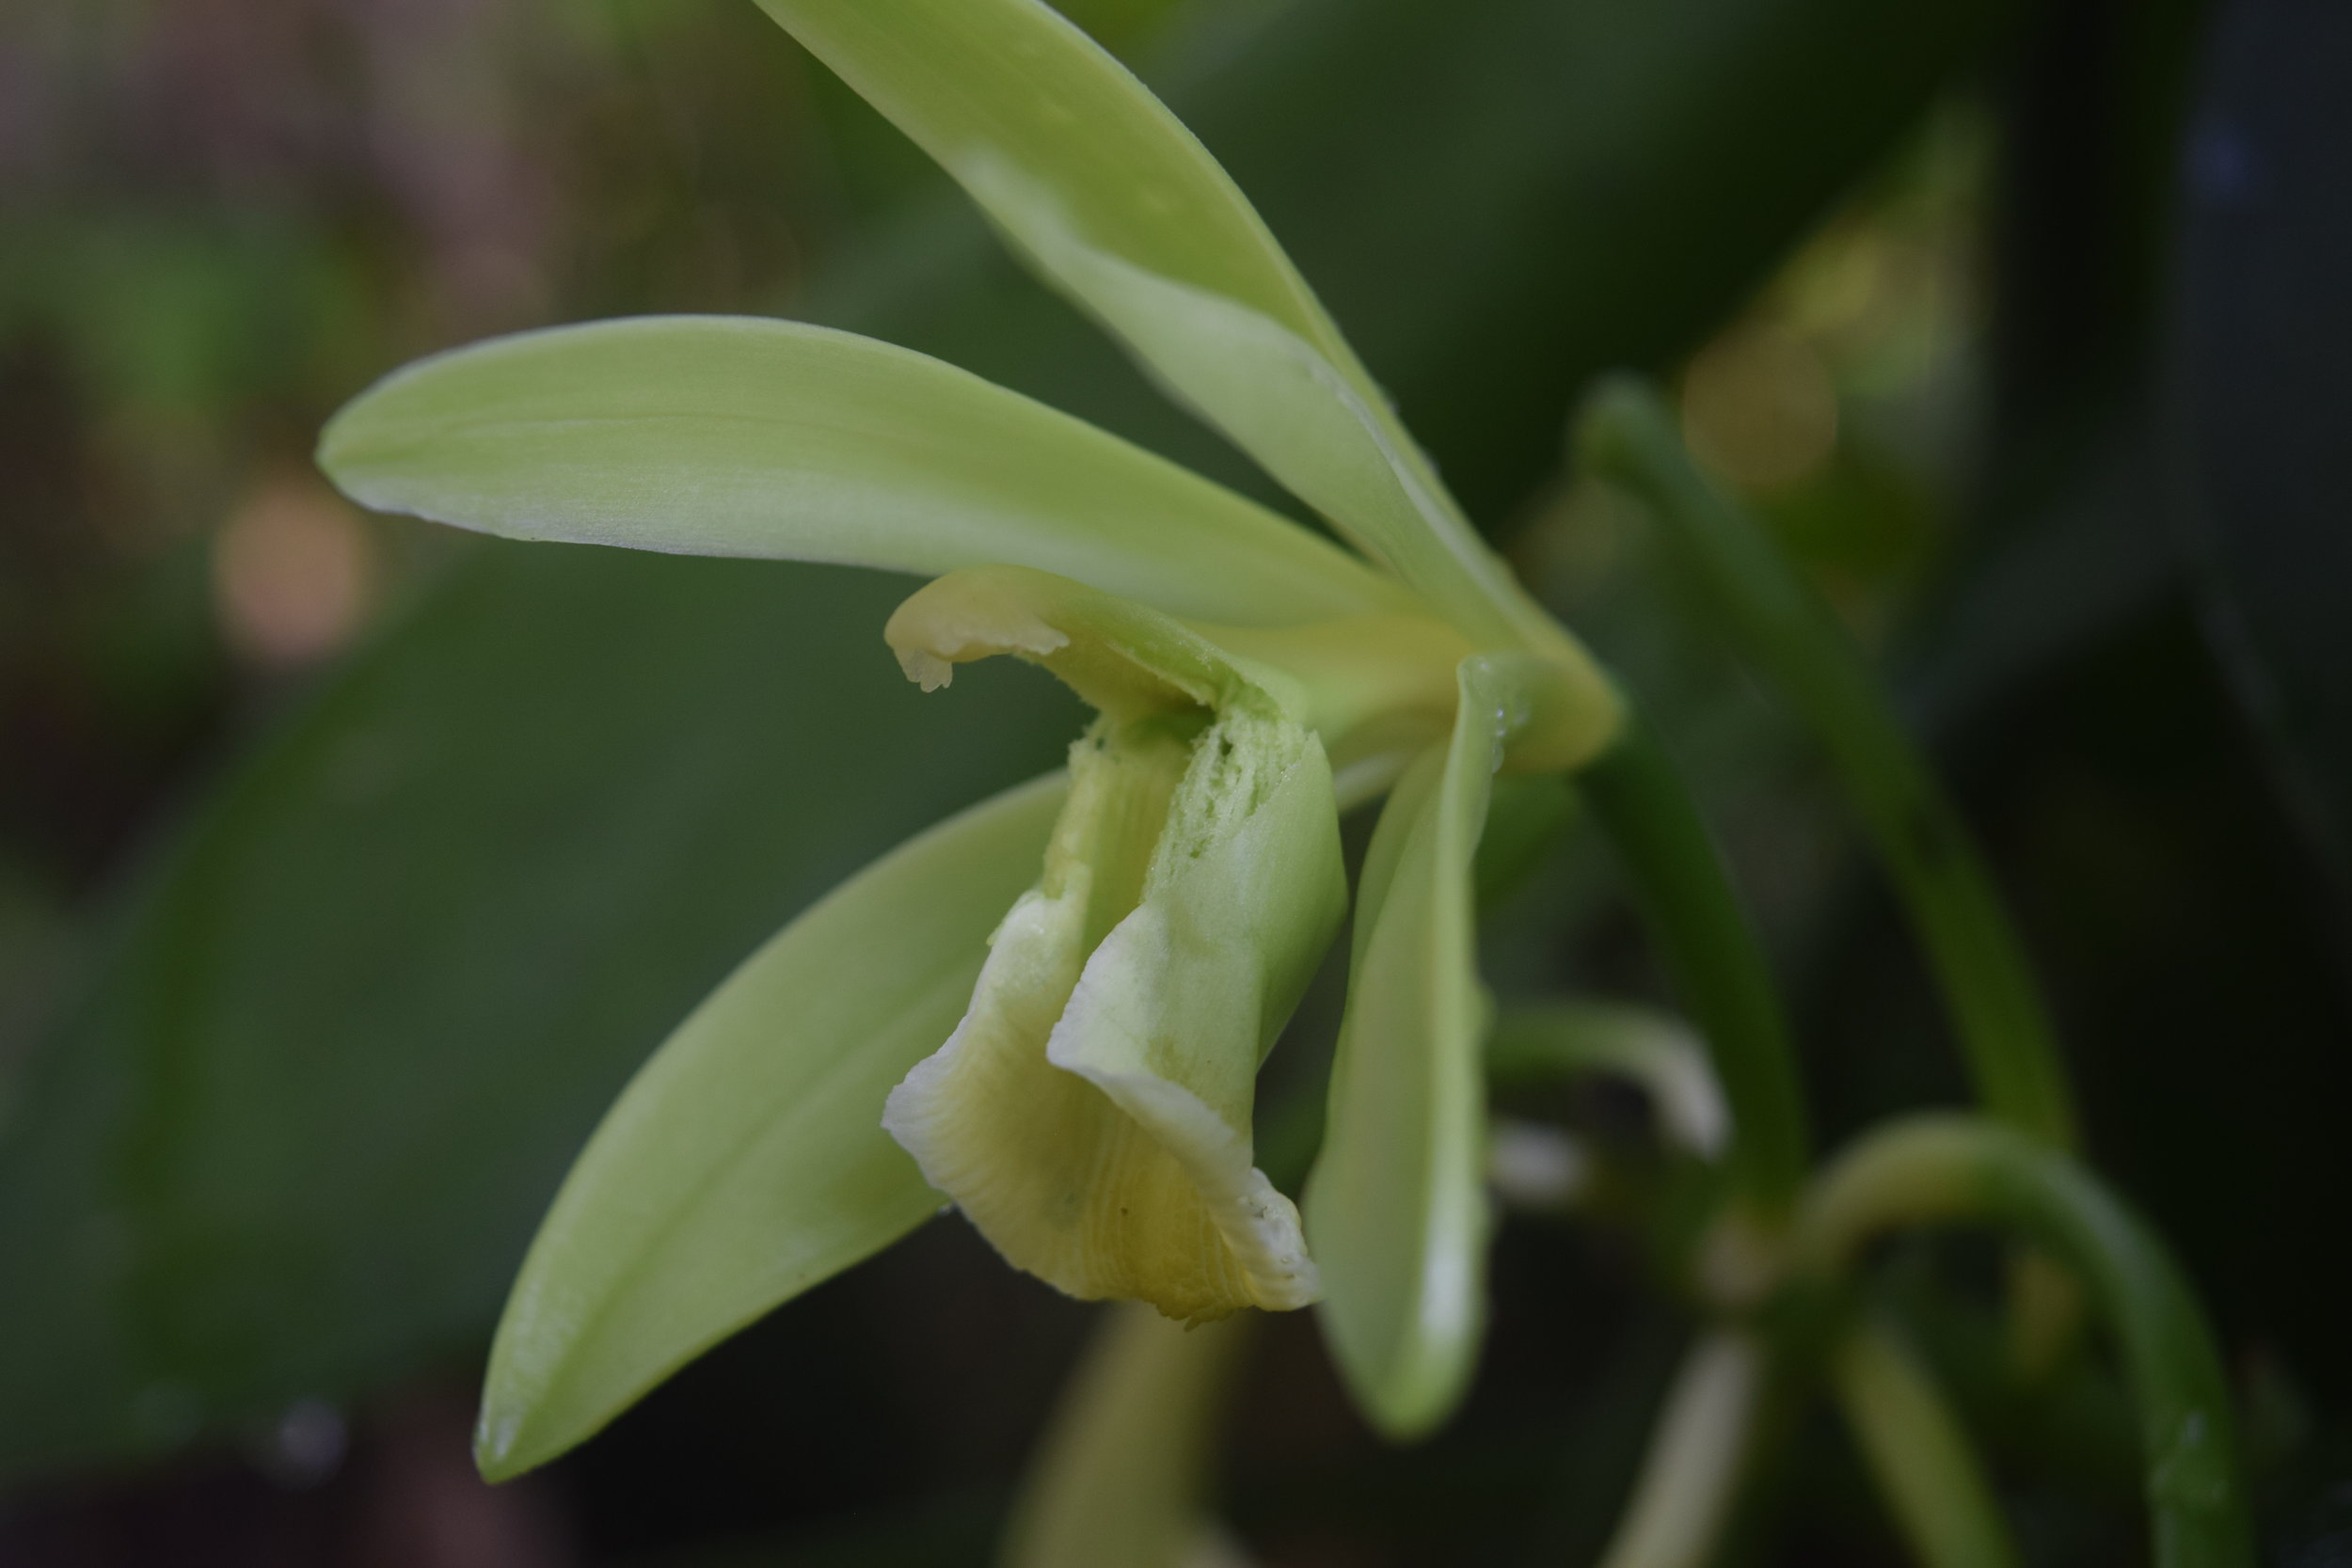
Pollination is a straightforward process once mastered. The goal is to push together the anther (male part of the flower) and the stigma (female). In between these reproductive organs there is a small flap, called the rostellum. The most common method for pollination is to take a toothpick, poke it into the side of the flower, lift the rostellum forward, and use your other hand to press the anther back onto the stigma. To facilitate this the bottom of the flower can be torn open providing improved visibility of the minute task. It sounds complicated, but it is a simple process that can be picked up quickly.
In commercial plantations there should be considerations of which flowers of the bunch are best to pollinate based on expected size of the pod, how many flowers in total to pollinate per plant without stressing the plant (30 to 60), and much more.
The above photo gallery shows young flowers emerging, a close up shot of vanilla pollen, the process of hand pollination, what the flower looks like immediately after we have done pollination, and what the flower looks like a few days after successful pollination.
Fertility
The vanilla vine gets most of its nutrients from the mulch layer around the base of the support tree. As an epiphyte it also takes in nutrients from the air. The best fertility program is ample mulching with leaves and woody branches and regular foliar sprays such as mountain microorganisms, effective microorganisms, or actively aerated compost tea. The occasional application of high quality compost is encouraged. Avoid applying animal manure as the high nitrogen content encourages vegetative growth over flowering.
A well mulched vanilla plant.
Labor
A commercial vanilla orchard is a high maintenance affair. Post management, vine guiding, pollination, and all the post harvest processing activities require consistent and diligent care. Vanilla is one of the most labor intensive agricultural commodity in the world. On a homestead scale much of this work can be made easy through good siting. If the plants are on a path that is walked multiple times per day, than it is much easier to quickly guide a vine back into place, or recognize that a fruit is ready for harvest.
Harvest
Vanilla pods, also called beans (though not beans at all), are ready nine months after pollination. They are ready to harvest when the tip starts turning yellow. After harvest begins the processing to turn this scentless and flavorless pod into a glistening, oily, fragrant product that is incredibly valuable.
Vanilla pods growing to full size a few months after pollination.
Drying and Fermentation
Pick the beans when they are ready—full, with just a hint of yellow at one tip, not splitting or fully yellow. Immediately kill the beans by putting them in direct sun for a few hours, until they feel very hot. Sort them by size, with the larger and smaller ones grouped in different piles. Separation is necessary because larger and smaller beans cure at different rates.
Wrap the beans in their respective piles in pieces of black cotton. Put this bundle in a plastic bag inside a closed box, over night. This begins the process of sweating, which you will continue to alternate with sunning for the next few weeks. Each day, unwrap the beans and spread them out in the sun for about three hours, then wrap them back up in the cotton and plastic, and sweat in the box. Repeat this process daily for two to three weeks, or until the beans are soft, fragrant, pliable, and relatively flat. Small beans can tolerate less sun than large beans, and will take a shorter period of time to cure. You must avoid overexposing the beans, in which case they will dry out and harden.
Curing dehydrates the bean, and ferments the interior which improves the fragrance and flavor. The beans should never, ever, ever, ever, get hard or crispy, and they should never grow mold. The point is for them to become thoroughly immersed in their own oils. It can help to rub each bean between your hands each day to spread the oils.
After the beans are sunned and sweated until black, fragrant, and pliable, its time to slow dry them in a shady indoor place on a rack. Do this for about three months, monitoring them closely to remove any that show signs of mold. When properly sunned and sweated, they should not mold.
At this point the vanilla can be stored in glass containers, or used to make vanilla extract.
Vanilla being dried during the curing process at Villa Vanilla.
Value Adding
Perhaps the easiest way to preserve vanilla post harvest is by making an extract of the cured pods. To do this, mince the vanilla beans into fine pieces. Mix one part minced vanilla by two parts vodka or other alcohol, at least 30% alcohol by volume. Put in a dark place and let sit for six months to a year, shaking weekly. When the liquid smells and tastes like vanilla, and the vanilla pieces no longer have any of their own fragrance or flavor, strain out the pieces and bottle the liquid extract. There are many variations of this recipe.
Help Getting an Orchard Set Up?
If you are interested in growing vanilla for your home or as a potential cash crop then Porvenir Design can help. We’ve been planting and pollinating vanilla of our own for the last half decade. From sourcing plants and genetics, to orchard siting and layout, to pollination and processing training, our team is very excited about this crop!
Resources
El Arbol Vol 2: Guia de Especies by CATIE y Frans Geilfus
Vanilla: Travels in Search of the Ice Cream Orchid by Tim Ecott
Chiles to Chocolate: Food the Americas Gave the World edited by Nelson Fosier and Linda Cordell
Vanilla Orchids by Ken Cameron

